From the moment I read the background for these nutters, I knew I had to have an army of them.
Command. My custom made Chapter Master Gabriel Seth, Mephiston, Corbulo, and Lemartes
Flesh Tearer Death Company Dreadnought
Flesh Tearer Death Company

The Mighty Blood Angels take on Da Blue Bandit’s War Horde in the latest Epic 2014 League game.
The Blood Angel list
DEATH COMPANY [450]
Chaplain, 4 Assault Death Company Units, 2 Furioso Dreadnought
THUNDERHAWK [200]
ASSAULT DETACHMENT [375]
6 Assault Units, 2 Assault Units, Chaplain
THUNDERHAWK [200]
PREDATORS [375]
4 Baal Predator, Blood Angels Hunter
DEVASTATOR DETACHMENT [400]
4 Devastators, 2 Land Raider
TACTICAL DETACHMENT [675]
6 Tacticals, Supreme Commander, 3 Stormraven Gunship, Blood Angels Hunter
LAND SPEEDERS [200]
5 Land Speeder
THUNDERBOLT FIGHTERS [175]
2 Thunderbolts
The Ork list
BLITZ BRIGADE [150]
2 Flakwagon, 2 Gunwagon
BLITZ BRIGADE [150]
2 Flakwagon, 2 Gunwagon
BLITZ BRIGADE [150]
2 Flakwagon, 2 Gunwagon
MEKBOY STOMPAMOB [670]
3 Stompa, 4 Killa Kan, 2 Dreadnought, Supa Stompa
WARBAND [250]
2 Nobz, 6 Boyz, 2 Grotz, 2 Boyz + Grotz
FIGHTA SKWADRON [300]
6 Fighta Bomba
LANDA [200]
WARBAND (BIG) [630]
4 Nobz, 12 Boyz, 4 Grotz, 8 Battlewagon
KULT OF SPEED [200]
8 Warbuggy
BLITZ BRIGADE [150]
4 Gunwagon
BLITZ BRIGADE [150]
4 Gunwagon
Da Blue Bandit’s Big Stompy Toys

Blood Angel objectives (the gold coins)
The Blood Angels set up strong left

The Orks win the roll and elect to go first
The Big Mob moves forward and occupies some ruins

The Thunderbolts go on Combat Air Patrol
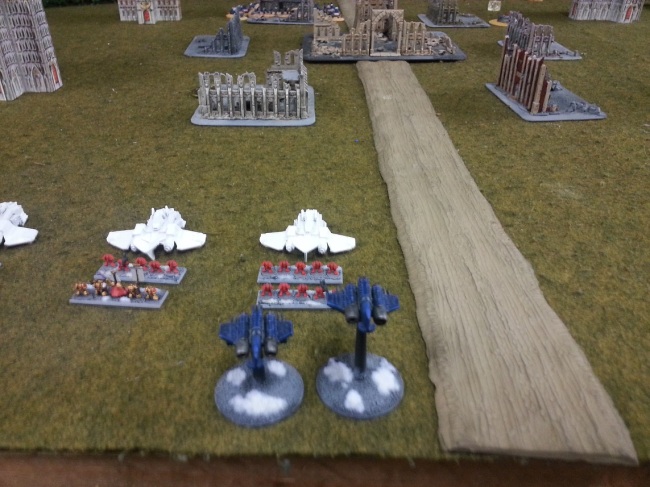
An Ork Blitz Brigade doubles, gleefully firing their guns in the air

The Devastators double and occupy the Imperial Building. They open fire on the Big Mob, but fail to do any damage

Blood Angel Land Speeders march over to the right flank in an act of deception (and activation burning)

Another Blitz Brigade advances…

Baal Predators advance and take cover, another Blitz Brigade moves (top right), and the Blood Angel command squad flies forward and opens fire on a Blitz Brigade, doing no damage

Aaaaand yet another Blitz Brigade advances, fires, but does no damage

Thunderhawk assault on the right flank

The marines easily mop up the small Blitz Brigade and consolidate

The Mekboy Stompa Mob doubles and shoots at the Blood Angel command squad,
laying down two blast markers but otherwise doing no damage

An intimidating (and loud and smelly!) Ork presence in the center of the field

Ork Warbuggies zoom up and shoot, doing no damage but putting another blast marker down
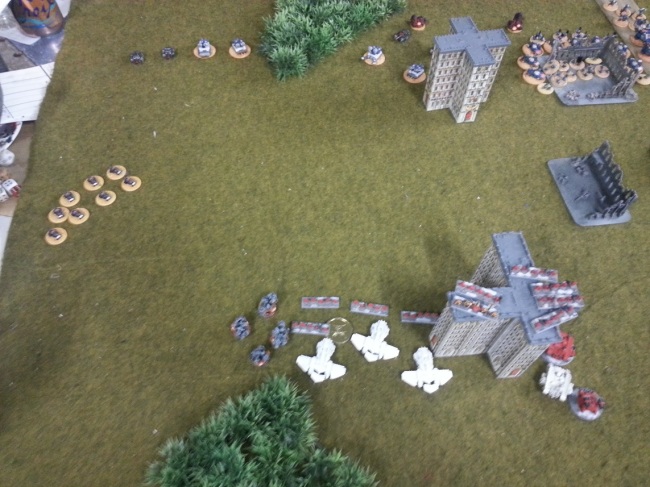
And the Fighta Skwadron flies in and wipes out all of the Stormravens
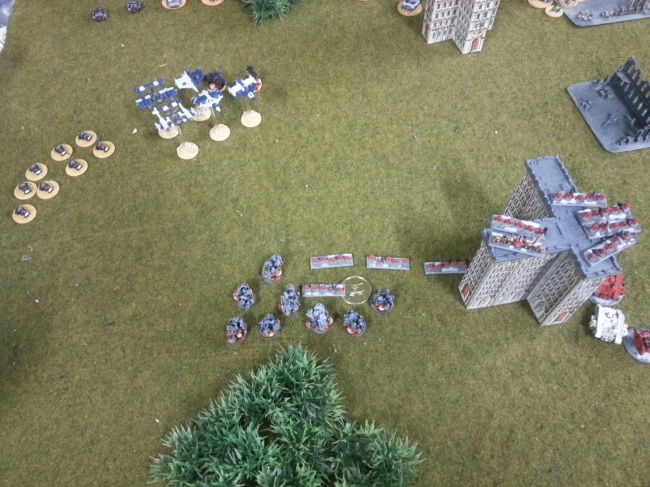
In a bold (foolish?) move, Da Blue Bandit sends his Landa on a strafing run against Blood Angel command. The Thunderbolts intercept and shoot it down, killing the warband inside

The Marines win the initiative roll and the Assault Marines engage a Blitz Brigade, wiping it out
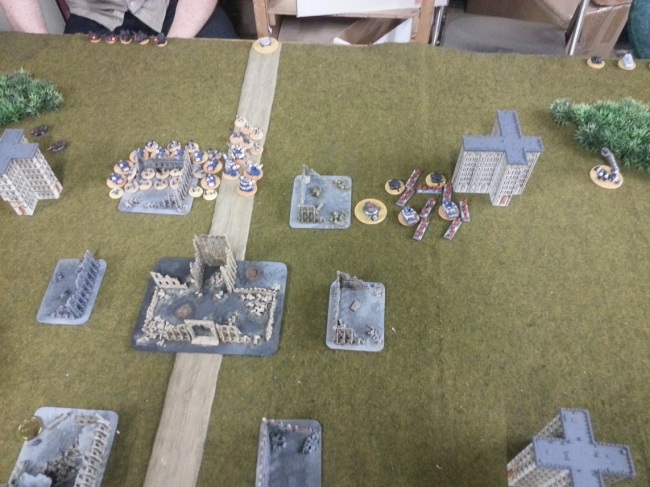
The Marines retain the initiative and the Devastators go on overwatch

The Ork Warbuggies move into flanking position and open fire, but do no damage

“I GOTZ A KUNNIN PLAN”, says the Blue Bandit. “YOUZ BOYZ IZ GUNNA CROSSFIRE DEM BEAKIES” The Orks retain, the Blitz Brigade doubles and opens fire, killing two stands and breaking the squad “AN’ DATZ WHY I’Z IZ DA BOSS!”, proclaims the Bandit. “NOW MY ‘EAD ‘URTS THO”

Blood Angel command beats an, ahem, tactical retreat to the cover of the AA umbrella
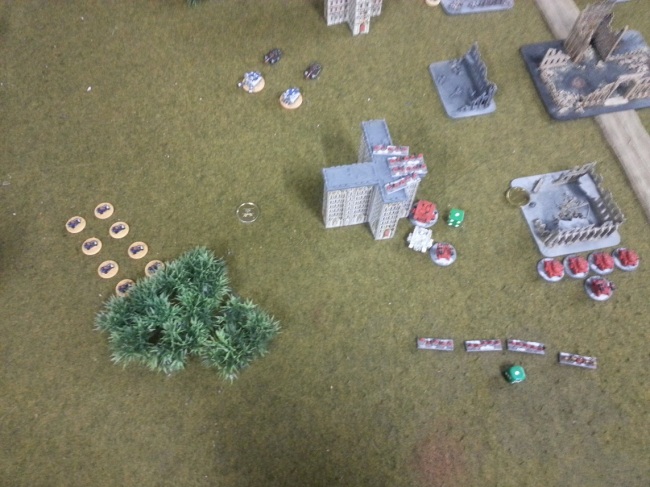
The Thunderbolts fail to activate and stay in the box of shame!

The Mekboy Stompa Mob takes a risk on an advance order and succeeds. The mob occupies the ruins in the center and blast away at Blood Angels command, killing two stands. The BA Devastators took overwatch fire, but did no damage

The Baals advance to within 15cm of the Stompa Mob, laying down a blast marker and taking down a shield from the Supa Stompa
(Note – this was a semi-pivotal point in the game. The idea was I would retain the initiative and Thunderhawk assault with the Death Company. However, I discovered here that the Supa Stompa was a 3DC War Engine, and that changed the math of the already risky assault enough to dissuade me from doing it, and left my Baals in poor position)
A Blitz Brigade doubles and shoots at BA command, but does no damage

Land Speeders fly up to threaten Ork objectives

The Big Warband doubles and destroys two Baal Predators

The Ork Fightas fly in and finish of Blood Angel command, earning the Break Their Spirit objective
END OF TURN 2
Turn 3, the Marines go first. Baal predators advance and destroy a gun wagon. Marines retain, and the Devastators abandon their position in the building and take cover behind it. They open fire and break the Warbuggies

The Supa Stompa shoots at the Land Speeders, but only manages to put down blast markers

The empty Thunderhawk strafes the Blitz Brigade, breaking it
The Blood Angels are desperately trying to destroy Ork objective grabbing units

The Assault squad moves to capture an Ork objective

The Big Warband reacts, contesting the objective and killing a stand of Marines

Thunderbolts strafe the Stompa Mob with the idea of putting down blast markers for a last-ditch Death Company assault to capture BTS

Realizing that isn’t likely, the Death Company lands on the Blood Angel’s blitz objective, in case any of the broken Ork units rally on top of it
End of Turn 3

End of Turn 3 Status
Orks – Break Their Spirit
Blood Angels – They Shall Not Pass
Unfortunately, the game store was closing and we had to declare the match a tie.
Post-game thoughts:
Hoo-boy. Where to begin. Well, it was an exciting and closely contested match. The Ork player is relatively new to Epic, but he is learning very quickly. It was a fun and very close game.
Blood Angels Playtesting Thoughts:
Eight-stand Assault Marine Squads – in the past, I have stated that this unit is useless or close to it. I stand corrected. They can be useful under certain circumstances. For coming in via Thunderhawk and mopping up isolated small units and grabbing backfield objectives, they can be useful. However, a Thunderhawk is absolutely required for this unit to be effective, making it a pretty hefty investment at 575 points. I’m not sure it’s 575 points useful.
Baal Predators – While I had success with this unit the first time I ran it, I am becoming less and less impressed the more I use it. I absolutely can’t see what justifies a 300 point price tag for these. The problem is that they are only useful against infantry, but most infantry stays cooped up inside of their transports, and Blood Angels don’t have a lot of tools for cracking those transports. So, most of the time, the Baals end up firing on armor, a task for which they are ill-suited. This unit should be 250 points maximum in my opinion, particularly in the context of the Blood Angel list.
The list as a whole still feels woefully under-powered to me, especially against armor, in spite of the fact that I took Stormravens and more Land Raiders. The Stormravens are simply too fragile to start on the table with, however, because all of the other Blood Angel units are so expensive, the 200 points that it costs to planetfall them is too much. I was already very light on activations for this match even without burning another 200 on a spacecraft. I almost feel as though Stormravens should be 50 points apiece, especially in light of the AT missile nerf.
675 points is an absurd cost for my command squad consisting of six stands of tactical marines, three Stormravens, and a Hunter. Just too much. I never want to take that unit again.
The Devastator squad with two Land Raiders performed decently and I will take that unit again. However, it’s a unit that any Space Marine list can take.
Due to the lack of AT weaponry in the Blood Angel list, the BTS objective is effectively off the table in every game. There was simply no way I could have destroyed that Stompa Mob through shooting, and I would have had to dedicate at least three or four units to assaulting it in order to win decisively and break it (which still would not have earned me the BTS). The Death Company with Furioso dreadnoughts, while powerful, just doesn’t pack the punch it needs to reliably break units like this. As a result, the Blood Angels enter nearly every game with a one-objective handicap.
Even being gifted with the Ork commander’s poor decisions – the Landa strafing run and then the poor placement of the Big Warband (giving me TSNP objective), I only managed a tie. Had the game gone to turn four, I am nearly certain I would have lost.
I should also note that I was running the Furioso Dreadnoughts at a 50 point cost.
I love the Blood Angels, but I can’t help but feel that justice is not being done for this venerable chapter with the army list as it stands.
Hello! Here we are with a battle report from out Los Angeles Epic League 2014. The Steel Legion army is not completely painted unfortunately. Ordinarily I am reluctant to make a batrep unless the armies are 100% painted, but, in the interest of gathering playtest data, here it is.
The lists:
Steel Legion Ducal Guard
SUPER-HEAVY TANK PLATOON [200]
Shadowsword
FLAK BATTERY [150]
3 Hydra
SENTINEL SQUADRON [100]
4 Sentinels
SENTINEL SQUADRON [100]
4 Sentinels
THUNDERBOLT FIGHTERS [150]
2 Thunderbolts
Blood Angels
DEATH COMPANY [450]
Chaplain, 4 Assault Death Company Units, 2 Furioso Dreadnought
THUNDERHAWK [200]
SPACECRAFT [200]
Strike Cruiser
TACTICAL DETACHMENT [275]
6 Tacticals
TACTICAL DETACHMENT [275]
6 Tacticals
SCOUT DETACHMENT [150]
4 Scouts
DEVASTATOR DETACHMENT [275]
4 Devastators, Blood Angels TL Lascannon Razorback
DEVASTATOR DETACHMENT [275]
4 Devastators, Blood Angels TL Lascannon Razorback
LAND SPEEDERS [200]
5 Land Speeder
PREDATORS [300]
4 Baal Predator
ASSAULT DETACHMENT [250]
6 Assault Units
THUNDERBOLT FIGHTERS [175]
2 Thunderbolts
The Battlefield and Deployment
Blood Angels win the strategy roll and force the Steel Legion to go first.
Steel Legion places Thunderbolts on Combat Air Patrol
Space Marines double with their scouts and occupy the buildings on their left flank

A Steel Legion Shadowsword advances and vaporizes a Baal Predator

Blood Angel Land Speeders push forward and hide behind the building that the scouts have occupied

Steel Legion Attack Buggies (counts-as Sentinels) advance and fire on the scouts, but do no damage

Blood Angel Devastators double and fire on the Leman Russ Tank Company

Baneblades retaliate, killing 3 stands of devastators and their Razorback

The second formation of Devastators doubles and fires at the Baneblades, but do no damage
Shadowsord advances and fires on the damaged Devastator squad, killing the marines and breaking the formation. It flees back towards its deployment zone

Assault Marines double along the right flank

The Regimental HQ advances and fires upon the Assault Marines, killing two stands

Baal Predators double, but only inflict two casualties
Steel Legion Hydra Battery advances and fires on the Devastators, killing one stand
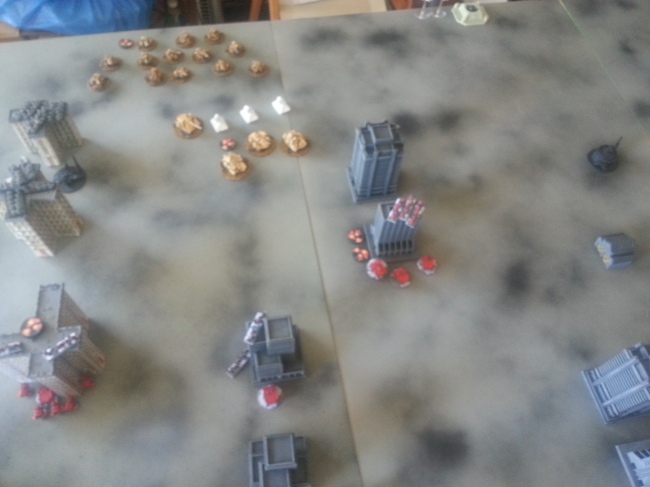
Thunderhawk Assault! Steel Legion Thunderbolts attempt to intercept, but do no damage. Death Company assaults, supported by the Baal Predators, and breaks the Regimental HQ
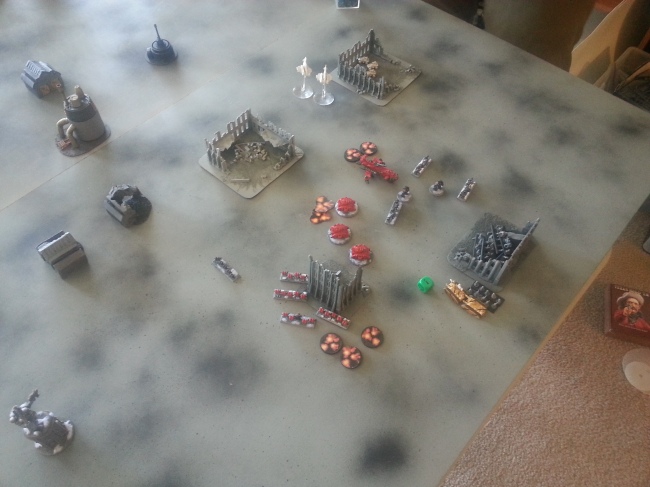
The garrisoned Infantry Platoon on the left flank opens fire on the scouts, but inflicts no kills

Space Marine Drop Pods arrive. This was a pivotal issue in the game – The Steel Legion commander had correctly predicted the location of the Space Marine drop in the center of his own deployment zone, and set his forces up to pincer the dropping marine forces. The Marines tried to alter their drop zone as far as possible from the Leman Russ Company hoping to establish a beachhead on the right flank, but were still left exposed and in poor position.
One Tactical Squad opened fire on the broken Regimental HQ, killing all but two stands.
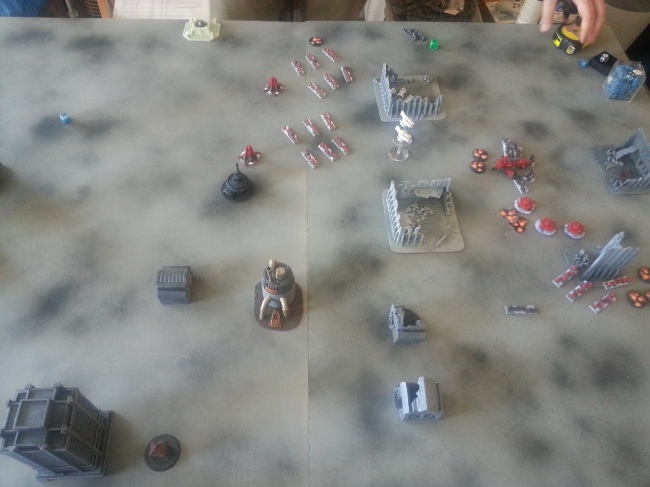
The vengeance of the Leman Russ Company is swift and furious. They double, open fire on the other Tactical Squad and break it. The Tac Squd retreats to nearby ruins.

After some suppressing fire from the Tactical Squad, Space Marine Devastators Launch a valiant assault against the Leman Russ Company

The Devastators manage to force three rounds of combat! Alas, the Russes are just too strong. But the Marines manage to take three tanks with them.

The Baal Predators advance and fire on the Buggies in terrain, but only kill one. The Steel Legion Baneblades advance and open fire on the Tactical Squad, killing one stand

The Attack Buggies and Infantry Company fire at the Scout Squad, breaking it

Land Speeders advance and break the Attack Buggies

Stormsword advances, fires on the Tac Squad, killing one stand

Blood Angel Thunderbolts ground attack the Attack Buggies, breaking them

The Death Company Thunderhawk Assault goes horribly wrong. Despite only needing to roll a 3 to tie the assault or a 4+ to win, the dice come up double-twos, and they lose.

The Hydra Battery advances and breaks the Tactical Squad

Steel Legion Thunderbolts ground attack, killing two Land Speeders
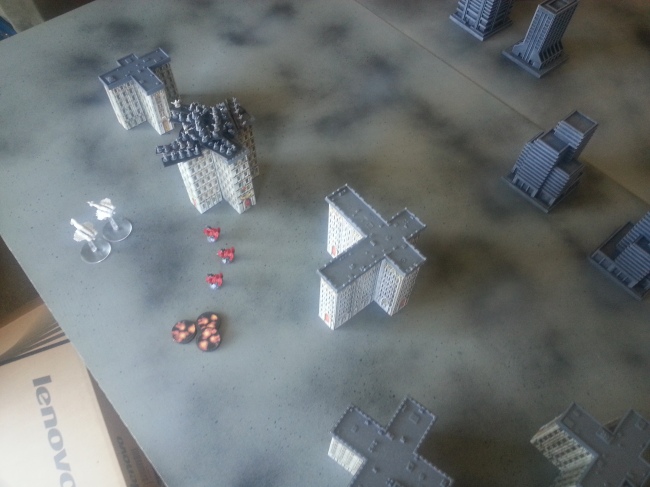
In the Rally Phase, the only Blood Angel formation that manages to rally is the Death Company, who, of course, cannot capture objectives. At top of 3, the Angels only have four unbroken formations left (one of which cannot score).

Infantry Company opens fire on the Land Speeders, breaking them. Down to three unbroken formations

The Baal Predators attempt to march to take a Defend the Flag objective, and fail activation on a 1

The Leman Russ Company opens fire on the Death Company and destroys it, sealing victory with Break Their Spirit and Defend the Flag. The Blood Angels do not have enough unbroken formations to contest or take any objectives with.

Victory Steel Legion.
Post-game thoughts –
1. First of all, kudos to the Steel Legion commander for setting up that drop zone trap. And shame on me for falling for it. That was a huge blunder that was difficult to recover from. Ordinarily, however, I don’t think it would have necessarily been a fatal mistake, but several other factors combined to make victory very difficult for me.
2. Blood Angels have no anti-tank. There is basically no way I could have dealt with that huge 13-strong Leman Russ Company. I did get close to breaking it in assault, but, with so many tanks, any given Space Marine formation is likely to be outnumbered, sometimes even 2-to-1 just going in. In the way of anti-tank shooting, I only had the Razorbacks and missile launchers, which needed 7s most of the time. There just is no way for this list to deal with Baneblades and Russes short of assault.
3. Bad dice-rolling. Couldn’t rally any units, failed a bunch of activation checks, etc. I feel like BA dice-rolls need to be on point going up against a bad matchup for the army such as Steel Legion, and the dice just weren’t there for me. Perhaps it is a reflection of a weakness in the list that there is no room for bad dice rolls.
4. Furioso dreadnoughts are not worth 75 points. For what they bring to the table, I can’t see why they are so expensive. At 50, they might be worthwhile – I could have had two additional LasCan Razorbacks with those additional points. But even at 50 they are far from “auto take”. Seems better to load the Thunderhawk up with Death Company and a Devastator formation.
5. I think Stormravens could have helped against Steel Legion with their AT missiles and alpha strike abilities. Unfortunately, however, I have pledged all painted for this league, and I didn’t have my Stormraven models painted up yet.
This is the first league game to determine the fate of planet Maarkus IV! Both the Blood Angels and the Space Wolves are laying claim to the glory of bringing the planet back into the Imperial fold, but only one can win.
The Battlefield
The Armies
DEATH COMPANY [300]
Chaplain, 4 Assault Death Company Units
ASSAULT DETACHMENT [300]
6 Assault Units, Chaplain
ASSAULT DETACHMENT [300]
6 Assault Units, Captain
PREDATORS [300]
4 Baal Predator
DEVASTATOR DETACHMENT [350]
4 Devastators, Blood Angels TL Lascannon Razorback, Blood Angels Hunter
Rhinos
DEVASTATOR DETACHMENT [350]
4 Devastators, Blood Angels Hunter, Blood Angels TL Lascannon Razorback
Rhinos
TACTICAL DETACHMENT [475]
6 Tacticals, Supreme Commander, Land Raider, Blood Angels TL Heavy Bolter Razorback
Rhinos
TACTICAL DETACHMENT [275]
6 Tacticals
Rhinos
LAND SPEEDERS [200]
5 Land Speeder
SCOUT DETACHMENT [150]
4 Scouts
Rhinos
(I forgot to include the Land Speeders in the picture)
The Space Wolves
GREAT COMPANY [425]
6 Grey Hunters, Battle Leader, 2 Long Fangs
GREAT COMPANY [575]
6 Grey Hunters, Battle Leader, 2 Long Fangs, 2 Land Raider
LAND SPEEDERS [200]
5 Land Speeder
THUNDERBOLT SQUADRON [175]
2 Thunderbolt Fighter-Bombers
WHIRLWINDS [300]
4 Whirlwinds
REAVER CLASS TITAN [650]
PREDATORS [250]
4 Predator Destructor
STRIKE CRUISER [200]
Space Wolves Strike Cruiser
(Something like this – I am missing a few units, but this was the gist of the list)
Deployment
The Blood Angels set up across the entirety of the board with Baal Predators and Scouts on the left flank, Two Devastator formations, Two Assault Formations, the Death Company, and the Command Tactical Squad in the center, and a Tactical formation and Land Speeders anchoring the right flank.
The Space Wolves set up with their Reaver Titan in the center, Annihilator Predators on their left flank, Land Speeders on the right, and Command Great Company holding down the center. Another Great Company waits in orbit on the Strike Cruiser, which will arrive Turn 3.
The Armies Face Off
Here you can see the two Blood Angel objectives to the right, and the Space Wolf objectives toward the left, represented by pink chips.
The Blood Angels win the initiative roll and elect to move the Scouts into position, setting up a screen across the left flank
The Space Wolves double with their Predators, open fire on the Blood Angel Land Speeders and kill one
The Land Speeders quickly retaliate, but fail to hit
The Space Wolf Titan doubles to the center of the battlefield and opens fire on a Blood Angel Devastator formation
The Titans weapons are devastating, destroying two Rhinos, a Hunter, and a stand of Marines
The Space Wolves Command Great Company doubles into cover and opens fire on the scouts, killing a Rhino and a stand of men
The Blood Angels advance a Devastator formation and open fire on the Space Wolves in the building, but fail to do any damage
Space Wolf Land Speeders double into firing position and attack the Blood Angels Devastators, killing a Rhino
Baal Predators retaliate, doubling into firing position and killing two Space Wolf Speeders
The Blood Angel Command Tactical formation advances into cover and opens fire at the Space Wolves in the building, failing to do damage. The center of the battlefield is getting very hot. The Space Wolf whirlwinds open fire (on what, I forgot), but fail to damage.
The Space Wolves are out of activations. Two Assault formations and the Death Company double into assault positions with impunity. It’s a bold move – the Blood Angels are banking on winning the initiative roll for Turn 2.
TURN 2
Foolish mistake. The roll is a tie, and since the Blood Angels won the roll last turn, the Space Wolves win the roll this turn. The whirlwind immediately opens fire on the two Assault Formations and the Death Company. The Great Company in the building retains, declaring an assault on one of the Blood Angel assault formations
The assault is furious. The Space Wolves wipe out five stands of Blood Angels and only lose one in return. The broken Blood Angel formation was the one containing the Captain. Blood Angel dreams of calling a combined assault are crushed then and there.
The Blood Angels commander is able to think clearly enough to prioritize his moves in spite of thirsting for vengeance, and sends the Land Speeders against the Reaver Titan, damaging some shields. Devastators advance as well, and drop more shields.
All Weapons are hot on the Space Wolf Command formation, but it proves surprisingly resilient.
Space Wolf Land Speeders make a daring move behind enemy lines, shooting at a Blood Angel assault formation but failing to hit.
Space Wolf Predators declare a Titan supported assault against the Blood Angel Landspeeders and wipe them out.
Baal Predators advance and open fire on the Space Wolves Command Company, causing heavy casualties and breaking the formation. The Space Wolves flee.
Thunderbolts fly in to harass Blood Angel Devastators
The other Blood Angels Devastator formation doubles over to get within 30cm of the broken Space Wolf formation and also to lay down fire on the Reaver
The Reaver retaliates, causing horrendous casualties and breaking the formation. The Devastators flee.
The Death Company marches to get within assault range next turn and to stay within 30cm of the broken Space Wolf formation
A six-strong Blood Angel assault formation led by a Chaplain assaults three Space Wolf Landspeeders and lose the assault! They are broken and flee.

The Scouts looking to the skies to see the approaching Space Wolf Strike Cruiser, spread out to restrict the drop zone the best they can.
TURN 3
The Blood Angels win the initiative roll. During the rally phase, the broken Space Wolves command formation fails to rally due to the presence of the Death Company.
The Death Company charges the Space Wolf Whirlwinds, completely wiping them out. The Blood Angels retain and open fire on the Space Wolf Land Speeders behind their lines, wiping them out and destroying hopes of a last ditch objective grab.
The Blood Angels rush the Space Wolves Blitz objective with the Baal Predators
Space Wolf Predators fire ineffectively (not pictured), and Blood Angels scouts spread out over their Blitz objective to prevent the drop pod assault.
Thunderbolts fly in to finish off the broken Devastator formation, but fail to damage it
The Assault formation that lost the assault to the Land Speeders in the previous turn rally during the recovery phase, and double to sit on top of a Space Wolf objective. The Blood Angels now have Take and Hold, Blitz, and They Shall Not Pass.
The Reaver TItan opens fire into the Blood Angel Command formation, doing tremendous damage.
The other Blood Angel tactical formation advances to an objective and open fire on the Space Wolf Annihilators, failing to hit. But the Blood Angels now have Take and Hold, Blitz, Defend the Flag, and They Shall Not Pass.
The Space Wolf Strike Cruiser activates, dropping its barrage on the Space Wolf Blitz objective occupied by the Baal Predators. Unfortunately, the blast does no damage.
The Space Wolves rain from the skies in their Drop Pods and assault the Blood Angel Tactical formation, nearly wiping it out. But it is too little, too late. The Blood Angels have the Blitz and Take and Hold objectives, and the Space Wolves have no more activations with which to contest. Blood Angels win 2 – 0.
Final Thoughts:
This was a bloody and hard fought battle. Writing this battle report, I realize it may have looked a little one-sided in turn three, but it really felt a lot closer than that. A couple of different moves, a couple different dice rolls in either direction, and it could have been a Space Wolf victory. I think the Space Wolf player made a mistake in not sending the Reaver after the Baals on the Blitz in turn 3. Had the game gone on to turn 4, I am not sure I could have held on. I really had no answer for the Reaver.
I looked at the Space Wolf list before going into the match, and it occurred to me that there is a lot of rope to hang yourself with in terms of taking big, expensive formations. I wanted to capitalize on this by keeping my activation count very high. This worked to my advantage throughout the course of the game.
I considered taking some drop pods and Thunderhawks, but these were big investments that I could put towards more activations, so I made the decision to forgo them.
The Baal Predators performed much better than I anticipated. I felt that 300 points might be pricey for them, but for the amount of devastation that they lay down at close range, it seems fair. Don’t get within 15cm of those things.
Super fun game, and thanks to my opponent for putting up a hard fight.